Gardening To Save The Planet – It’s not just what you grow, it is what you do with it

Every gardener gets to the point where the produce is overwhelming. I am not even talking about having more garden than you need. I mean I DO have more garden than I need BUT even one zucchini plant can fill a bushel basket towards the end of the season. Even a few tomato plants can leave you with a pile every week. It is the damnedest thing too, you can’t give them away because everyone else has the same problem…well you caaaan give them away but more about that later because it is kinda beside the point.

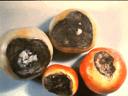
We are planting this garden to save energy. That is because corporate america has forced a food system down our throats that literally has us drinking oil (processing and transportation) for inferior food products. The additives alone consume enough energy to power America for years. What does that have to do with my produce? Fall will fall and winter will set in and then where are you going to get your produce from? That’s right the freedom from the corporate foodchain evaporates as you trudge back to the store dreaming of those green beans you gave to your mom. Who love’s yah now baby?  So we need a way to store this produce until we need it. Basically we have to combat rot:

rot.jpg rot1.jpgrot2.jpg

www.hubcap.clemson.edu

www.ipm.iastate.edu

 www.caf.wvu.edu

:}

Yes that is right just like poop, rot is stinky stuff that is hard work. But rot is our friend when it comes to poop on the garden and our compost pile. Rot here is bad though. There are many ways to combat food rot, that is to preserve the food until you need it later. You can dry, cook, or chill your food and that will slow down the mold and bacterial processes that degrade your food. Basically what we are talking about is securing the nutrients.

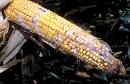
The Oldest method of preserving food is to dry it. This was brought home to me when my wife went mushroom hunting last spring. She took one of my string bags with her. Months later I used the bag for something else and this cute little morel fell out and hit the floor. It was perfectly preserved and hard as a rock. I guarantee that if I put it in water it would reconstitute a mushroom fit for cooking. The fancy  pants phrase for taking the water out is dehydrating and the 37$ phrase for putting the water back is reconstituting or re-hydrating even worse. I prefer solar drying. The ingenuity of this is it is solar inputs (growing the food) and solar outputs (preserving the food). Not a drop of oil is spilled.There is a loss of nutritional value and taste/palatability in this or any preservation process, though there are some herbs that are actually better dried.

:}

http://www.budget101.com/dehydrated_foods.htm

Drying is the oldest method of preserving food. The early American settlers dried foods such as corn, apple slices, currants, grapes, and meat. Compared with other methods, drying is quite simple. In fact, you may already have most of the equipment on hand. Dried foods keep well because the moisture content is so low that spoilage organisms cannot grow.

Drying will never replace canning and freezing because these methods do a better job of retaining the taste, appearance, and nutritive value of fresh food. But drying is an excellent way to preserve foods that can add variety to meals and provide delicious, nutritious snacks. One of the biggest advantages of dried foods is that they take much less storage space than canned or frozen foods.

Recommended methods for canning and freezing have been determined by research and widespread experience. Home drying, however, does not have firmly established procedures. Food can be dried several ways, for example, by the sun if the air is hot and dry enough, or in an oven or dryer if the climate is humid.

With the renewed interest in gardening and natural foods and because of the high cost of commercially dried products, drying foods at home is becoming popular again. Drying is not difficult, but it does take time and a lot of attention. Although there are different drying methods, the guidelines remain the same.

Although solar drying is a popular and very inexpensive method, Illinois does not have a suitable climate for it. Dependable solar dehydration of foods requires 3 to 5 consecutive days when the temperature is 95 degrees F. and the humidity is very low. The average relative humidity in central Illinois on days with 95 degrees F. temperatures is usually 86 percent. Solar drying is thus not feasible.

http://www.motherearthnews.com/Real-Food/2003-06-01/Choosing-a-Food-Dehydrator.aspx

DAVID CAVAGNARO

Home-food dehydrators fall into two categories: those with stackable trays, and those constructed of a rigid box with removable shelves. Size is a factor; most fit on a countertop, but larger models are free-standing and require more space. Some models have base-mounted fans that move hot air vertically; one has a rear-mounted fan for moving air horizontally; yet another uses convection drying, with no fan at all.

I put these four different models through their paces during the peak of the humid harvest season here in Iowa. Each dehydrator dried lots of herbs and vegetables with comparable ease, but the fleshy crops, like tomatoes and peaches, put the dehydrators to the ultimate test, determining their maximum capacity, efficiency and overall effectiveness.

(dotdotdot)

All of the dehydrators I tested have their appropriate applications, and all performed well under most conditions. Determine your needs, space limitations and budget before you buy. When it comes down to preserving food flavors and quickly drying fruits, vegetables and meats, especially when fully loaded and under humid conditions, the Excalibur Large Garden model won my highest praise. Its rear-mounted fan, in my experience, simply did the best job.

:}

There are some special concerns with fruit:

Food Drying Principles

Dehydrating your own produce does require time and some knowledge of food drying principles.

Preparation

  1. Select the best fruit and vegetables! As with canning and freezing, dehydrated foods are only as good as the fresh fruit or vegetables. When selecting fruits and vegetables for dehydration, choose ones that are ripe, unbruised and at peak-eating quality.
  2. Prepare foods to be dehydrated as you want them to be served. Apples, for example, may be sliced, cut into rings, or pureed for fruit leather.
  3. Keep pieces uniform in size and thickness for even drying . Slices cut 1/8 to 1/4-inch in thickness will dry more quickly than thicker pieces.
  4. Some foods should be washed before drying. Foods such as herbs, berries and seedless grapes need only be washed before dehydrating.

After Drying (for fruit only)

  1. Allow dried FRUIT (not vegetables) time to “condition”: When dry, allow fruit to “condition” for four to 10 days before packaging for storage. The moisture content of home dried fruit should be about 20 percent. When the fruit is taken from the dehydrator, the remaining moisture may not be distributed equally among the pieces because of their size or their location in the dehydrator. Conditioning is the process used to equalize the moisture. It reduces the risk of mold growth.
  2. To condition the fruit, take the dried fruit that has cooled and pack it loosely in plastic or glass jars.
  3. Seal the containers and let them stand for 7 to 10 days. The excess moisture in some pieces will be absorbed by the drier pieces.
  4. Shake the jars daily to separate the pieces and check the moisture condensation. If condensation develops in the jar, return the fruit to the dehydrator for more drying.
  5. After conditioning, package and store the fruit as described below.

:}

Now you know why they call it dry wine….

Energy Efficient Gardening – What about your soil

So you have your soil test back. Hopefully you have planted several plantings of your favorite stuff to eat so that they will continue to produce for as long as the weather will allow. In a totally fluke year I had some spinach that lasted for a year and well into the next spring.

It is time to start both improving your soil and planting your “main” crops. The soil test says that you “need something”. Now I am not going to cover all of the soil additives but usually there will be somekind of chemical deficiency. Here you run smack dab into your modern industrial farming dilemma. Don’t worry, this will only last for a year. At the end of World War II the world had a total surplus of explosives and poison gas. What to do? Well they converted the explosives to nitrogen fertilizer and they turned the poison gas into herbicides and pesticides. Farmers fell in love with them and well here we are no longer loving our food. NO2 (commonly called Nox) is a much more potent greenhouse gas than CO2 It is estimated that when farmers fertilize there fields they castoff more greenhouses gases than the entire world’s transportation fleet:

http://gristmill.grist.org/story/2008/5/16/124957/304

Nitrogen bomb

‘Science’: nitrogen as important as carbon in climate change

Posted by Tom Philpott at 5:05 PM on 16 May 2008

Speaking of the troubles associated with industrial agriculture and its fertilizer regime, check this out:

“The public does not yet know much about nitrogen, but in many ways it is as big an issue as carbon, and due to the interactions of nitrogen and carbon, makes the challenge of providing food and energy to the world’s peoples without harming the global environment a tremendous challenge.”

The speaker is University of Virginia environmental sciences professor James Galloway (quoted in an AP piece), talking about his paper published (abstract here) in the latest Science.

According to Galloway, “We are accumulating reactive nitrogen in the environment at alarming rates, and this may prove to be as serious as putting carbon dioxide in the atmosphere.”

Nothing new here that I can tell at first glance. (I’d love to read the paper, but it’s password-protected.) I agree, though, that nitrogen’s role in climate change is way under-discussed.

The same issue of Science also contains an article about how synthesized nitrogen affects the oceans — specifically their role as greenhouse-gas sinks.

:}

So what to do about nutrients? Well it all comes down to crap. That’s right manure, excrement or poo. Not your’s. Though there is a case to be made for that, the small scale gardener is hard pressed to deal with human crap. In fact there are better fertilizers around. But lets take a step backwards, in the “old days” of sustainable farming the farmers had all kinds of animals, goats, cows, horses, mules, and chickens to name a few. They would collect this shit and straw from their animal’s housing and their yards and toss it in a pile. At the end of the growing season they would take all this manure and spread it on their field. Over winter it would break down. Then in the spring when they plowed they would turn it into the soil and “there you have it” fertile soil.

http://www.aces.edu/department/crd/publications/ANR-723.html

ENVIRONMENTAL EDUCATION SERIES
ENVIRONMENTAL QUALITY
Agriculture & Natural Resources

EXTENSION ENVIRONMENTAL EDUCATION, AUBURN UNIVERSITY, AL 36849-5647


Using Livestock Manure As Fertilizer

ANR-723, 1992. By Charles Mitchell, Extension Agronomist, Agronomy, Auburn University


Livestock manure is an excellent fertilizer for the soil, providing such nutrients as nitrogen, phosphorus, and potassium. Manure application can also benefit the soil’s water holding capacity and tilth. When using livestock manure, however, one should follow good management practices in order to avoid hazards to the crop and the environment. Sources Of Livestock ManurePoultry waste, cattle manure, and swine manure are all used as organic fertilizers in Alabama. They are all excellent sources for nutrients; however, nutrient compositions will vary among operations and over time. Users of manures from broiler houses, lagoons, or feedlots should have an idea of the total and available nutrient content before they are applied to land.Possible ProblemsBecause nitrate-nitrogen can leach into groundwater and both nitrogen and phosphorus can erode or runoff into streams, manure applications should be based strictly on the nutrient requirement of the crop. Therefore, the soil should be tested to determine nutrient needs for the crop to be grown.Good Management PracticesThe following precautions should be taken in order to prevent nutrient losses through leaching, erosion, and runoff:

  1. Eliminate excessive applications.
  2. Time applications appropriately, rotate crops,
  3. and use winter cover crops. Apply manure when it will be utilized by the crop.
  4. Incorporate or inject the applications into the
  5. soil. Do not leave the manure on the soil surface.
  6. Do not apply manure to steep slopes or during
  7. periods prone to erosion and runoff.
  8. Document the amounts and contents of material applied.
  9. Protect soil from erosion.
  10. Use filter strips or buffer zones between fields
  11. and nearby streams

:}

So when I end my growing season, I take a couple of big tubs to a local animal farm and I get free poo and straw from the farmer. Take it to my garden and toss it on. Big draw backs? It’s hard work and it stinks. But so what? Why did I say that this will be a problem for you only a year? Well because you have started a compost pile (hint hint) and you have located a farmer (hint hint). What to do now for you though. Well, you can go get fertilizer for one year and tell yourself everyone has to start somewhere. Or you can buy composted manure. Here again you have be to careful. Transportation and its oil use is the real issue so read the labels. Buy the composted manured produced the closest to you. If you are lucky you can find some poo from your own state. Now, if you have started your seeds inside and it’s time to plant YOUR plants. Or if you depend on a garden center it’s time to plant THEIR plants. Try to stagger them just like you did for your early crops so that they will produce for the entire growing season.

Oh, and for awhile you maybe a standard “row” gardener but there are more efficient ways to use your land:

http://www.squarefootgardening.com/

The Official Site of Square Foot Gardening and Mel Bartholomew, Originator and Author

Welcome  To  My  Garden

No Work, Organic Gardening the Square Foot Way


:}

or french intensive gardening


http://www.learn2grow.com/gardeningguides/edibles/planting/FrenchLesson.aspx

A French Lesson in Intensive Planting

Linnea Thornton

Juvenile Garden
Photo Credit: Courtesy of Barbara Wilde, L’Atelier Vert,Everything French Gardening, frenchgardening.com
This juvenile bed in a French garden shows how closely young plants are crowded together in intensive planting.

Crowding a bunch of plants in a narrow plot might not seem like a good idea at first. After all, it runs counter to everything you’ve learned about gardening. But this specialized method of planting – called French intensive gardening – is actually a tried-and-true technique to maximize your harvest in a small space. Even if you’ve only got a tiny plot, you can get amazing results if you develop it properly.
As you might’ve guessed by its name, French intensive gardening evolved in Europe. Its purpose is to make the most of limited growing space. Known as “square-foot gardening” in the US, it’s also the preferred method of many growers who want extra produce for themselves or to share with friends and neighbors.

:}

:}

What Is The Most Environmental Thing You Can Do Right Now – It saves energy as well

Plant a garden. You think I am kidding right. BUT if everyone on the planet who does not have a vegetable garden planted one, the world would change. Most products that you buy in the grocery store in America travel 1,500 miles…That’s a lot of gasoline products. All the produce, herbs and flowers you grow soak up carbon dioxide, especially sweet corn. Plus if you compost your garden waste you put that carbon directly into the soil where it will not be released. Plant a tree while you are at it. If all 7 billion people in the world planted a tree our problems would temporarily be over. Young trees soak up an incredible amount of carbon as they grow. Not to mention the health and well being benefits from working out doors and being away from modern stress inducers. Or the health benefits of eating good nutritious food. If you have kids teach them how to do it (it is no longer innate) and you will have passed along a valuable skill. Invest in an efficient refrigerator and a small efficient freezer to store your valuable products. This saves bunches too. If you are really adventurous invest in a dehydrator and a solar cooker or make your own. You save even more. By the time you are done heck you wlll amaze yourself at how much you have done. Seem impossible? NOPE, it starts with the first seed you plant. So lets get agrowing.

Getting Started:

Some of you are lucky to have year round growing conditions. As the world warms more of you will enjoy that perk. But where I live in Illinois it’s pretty much a 3 season affair. Today is March 6th and I plan on planting a row of peas and some lettuce and spinach. That will be dicey though and if we have an ice storm in April or early May it will be a wipe out. Such is life. If I get lucky I will be freezing sweet peas by the end of May. Here are some great sources for getting in the groove.

http://www.finegardening.com/

Planning Your First Vegetable Garden

March 5th, 2009 in Grow It, Live It

Ruth Ruth Dobsevage, editor

So you’ve decided to grow some veggies this year? Welcome to the club. Before you decide on what to grow or pick up a spade, you need to make some basic decisions about your garden’s location, size, and shape. Here are some things to consider.

Location
Walk around your property as you try to decide on a location for your garden-to-be.

Vegetables do best in full sun. You will get decent results with less than that, but in general strive for a site that gets at least six hours a day during the summer. Remember that sun patterns change dramatically with the seasons; a site that looks good in April may be too shady when the leaves come out.

Another factor to consider is proximity to your kitchen. You are more likely to check out your garden frequently if it is close to the house. My garden is maybe 30 feet from the kitchen door. When I need some parsley or mint, or maybe a few more tomatoes for a salad, it’s not a big deal to go out and get them.

If you have a choice, a flat area is better than a hilly one. A gently sloped site can work well, especially one that faces south or west.

What about water? You will most likely want a source close by, be it an outside tap, a rain barrel, or even a stream or pond.

Don’t despair if your lot is is very small. Even if you don’t see a way to create a separate garden area, you can probably tuck a couple of vegetable plants in somewhere: near the house or by the garage, perhaps. Or on the deck in containers.

Size and shape
For a garden of moderate size, aim for 400 square feet (20×20) to 625 square feet (25×25). You’ll have enough space to grow several different crops, but not so much that you’ll be overwhelmed. If even that seems daunting, start small. You can always enlarge the space later.

Gardens are generally square or rectangular, but they don’t have to be. You may want a different configuration to take advantage of sun patterns, to work around boulders, or just for artistic reasons. The plants won’t care if they are arranged in straight lines or curves.

:}

Personally I pick any 10 x 20 ft area that is unshaded and jump in. Begginners should start smaller. But if you are going to grow peppers, squash, corn or tomatoes you need a lot of space. Just think, the bigger your garden the less grass to mow.

http://www.organicgardening.com/

The Beginner’s Guide to Organic Gardening


 Gardening is not too complex. Almost all of us–probably in grade school–planted a seed in a cup of dirt, watered it, and watched it grow. But creating a garden that produces fresh food and flowers all season is not so elementary, especially to those who did not grow up gardening. So we’ve compiled this guide to the basics of organic gardening and the keys to success we’ve learned over the years. When you’re done reading, look at your thumb–you may see a tint of green that wasn’t there before.

No. 1 Plant Seeds

1. Make your bed. About three weeks before you are ready to plant, after the soil has dried so that it doesn’t clump when you pick up a fistful, sink a fork into the earth. Loosen it down to about 12 inches, add a half-inch layer of compost, and rake the surface of your garden until it has no weeds, dirt clumps, or big stones. Over the next three weeks, pull any weeds that come up. Raking and then letting the soil sit for a few weeks brings out weed seeds that were lurking in the soil.
For more information on garden beds, check out this article about raised beds and this video to see how to build a raised bed, or watch this video to see how to turn your lawn into a garden bed.


:}

I am not going to copy all of this stuff. go and read it yourself. If you have never done it before this is essential reading:


Garden Design

Horticulture

Garden Design

Country Gardens

Gardening How-To

Herb Quarterly

 Growing Edge

Water Gardening

Garden Compass

:}

Don’t read too long though, that’s what winter or nightfall is for. Get out doors! NOW

:}

Advances In Home Insulation – That’s right after the Inaugural it’s time to get back to work

Yah I know it is a downer to have to go back to work after the weekend PLUS back to back MLK/BHO days but life must go on. My motto for 38 years has been “You never ever lose money by investing in energy conservation”.  So put R60 in your attic.

http://greenbuildingelements.com/2008/04/11/aerogel-insulation-advances/

Aerogel Insulation Advances

Published on April 11th, 2008

14 Comments

Posted in Energy, Heating & Cooling, Materials

Aerogel is almost a product out of science fiction.

Nicknamed “frozen smoke,” aerogel is extremely lightweight material, with a density only 3 times that of air. Only a small fraction of a volume of aerogel is the material itself. Most of the volume is filled with air. This makes aerogel an excellent insulator. (Aerogel provides nearly 40 times the insulation of fiberglass insulation.)

Aerogel can withstand great pressures and is also an excellent sound insulator. Aerogels can also be used to absorb airborne pollutants and have been used to clean up oil spills. NASA also used a section of aerogel as part of its Stardust probe to collect samples of material from the tail of a comet.

Aerogel is available for some high-performance applications, but due to its high cost, it has not been widely used. However, new research from a Malaysian scientist offers the potential to drastically reduce the cost of producing aerogel, and could lead to new possibilities for its use as a building and insulation material.

Dr. Halimaton Hamdan from the Universiti Teknologi in Malaysia has developed a method of producing aerogel that could reduce the cost of producing aerogel by 80% by using agricultural waste from rice husks as the feedstock. Rice husks evidently have a high silica content, and silica is the main constituent of aerogel. In addition to potentially being able to produce aerogel for one-fifth the current cost, this also addresses a problem with disposing of rice husk waste.

Because aerogel is translucent, rather than completely transparent, one of the places it has first been used in architectural applications has been in daylighting panels. Commercial applications of aerogel are from companies such as Kalwall and Advanced Glazings,…..

:}

This stuff is really amazing and no you won’t put it in your attic because it costs a gazzillion dollars and is used in outerspace…still if you built a room out of it you could heat it with a candle until the air ran out…for cool videos however please see:

http://www.youtube.com/watch?v=ukq5Uy7iv7k

Oh you speak english…sorry

http://www.youtube.com/watch?v=zhcgI_DsSa4http://www.youtube.com/watch?v=JeQJ6e_8Wqs

http://www.youtube.com/watch?v=sf06j4eWeMk

:}

Yes I am bored SOOOOwhat? Here is the stuff you can put in your attic:

http://www.articlesbase.com/home-improvement-articles/spray-foam-insulation-drastically-decreases-air-leakage-from-a-home-365453.html

Spray Foam Insulation

Drastically Decreases Air Leakage from a Home

Andrew Stratton

According to the US Department of Energy, more than half of the energy cost of the average home goes into heating and cooling. Furthermore, 30% of the heating and cooling cost is the result of air infiltration. One of the newest advancements in home products, expanding spray foam insulation, can significantly reduce the amount of air leakage within a house.

Air leakage is often most noticeable during winter months. This is because it is during the winter that the maximum temperature difference exists between the warm interior and the cold exterior of a house. This maximum difference in temperature causes a large pressure discrepancy between a home’s inside and outside environments. In turn, this pressure discrepancy causes the warm inside air to be pushed through any small gaps to the cold laying outdoors. Therefore, these small gaps allow the heat which you paid for to escape from your house.

Expanding spray foam insulation can plug these small holes. The spray foam insulation accomplishes this task by expanding into the small gaps onto which it has been sprayed.

However, to be effective it may be helpful to understand where these small holes may occur. One often thinks of the spaces near a door or window when thinking about the possible locations where currents may arise. However, there may be other locations which are not as apparent. These other locations are usually less apparent because they are found within the attic, basement or crawlspace.

:}

For more please read the rest of the article or:

http://www.articlesbase.com/home-improvement-articles/spray-foam-environmentally-friendly-insulation-601399.html

Spray Foam: Environmentally

Friendly Insulation

Andrew Stratton

Everyone is going green, and many companies are making it easier than ever. If you want to do your part for the environment, a great way to start is right in your own home. With the advent of new technologies, there are now products available that will help keep the environment healthier without having to compromise your own comfort.

Spray foam insulation is one product for your home that has recently gone green. Spray foam insulation begins as liquid polyurethane that is then sprayed onto surfaces, creating a protective, insulating barrier. Since the foam is initially liquid, it easily covers all cracks and holes in the wall, covering a more thorough area than fiberglass or cellulose.

This means that your house will be more climate efficient. The heat will stay trapped inside during the cold months and the cool air will stay in during the summer. Not only will the temperature of your house be more comfortable, but you’ll save energy on your heating and cooling.

:}

So you can use a little or a lot. More places for this stuff are:

http://www.greenbuildingenergystar.org/home-insulation-sealing.php

http://www.basf-pfe.com/index.php?location=RRE&section=view-PRP&select=117

http://www.sprayfoamdirect.com/?gclid=COTskbqvoJgCFRlcagoddQHZng

www.TigerFoam.com/Insulation 

www.icynene.com/

Or if you like video and it seems we do today:

http://www.youtube.com/watch?v=VFjxWdPPY1Q

:}

Energy Tax Credits For 2009 – The last parting shot from GWB

http://www.ase.org/content/article/detail/2654

Energy-Efficiency Home

and Vehicle Tax Credits

Energy-Efficiency Home

and Vehicle Tax Credits

President Bush has signed into law new consumer tax credits for energy efficiency home improvements, as well as purchases of plug-in hybrid vehicles. These provisions were included in H.R. 1424, the Emergency Economic Stabilization Act of 2008, which the president signed on October 3, 2008. The homeowner tax credits are largely the same – but not identical – to those that expired at the end of 2007, and begin again on January 1, 2009.

Taxpayers who claimed some but not all of the $500 federal income tax credit for energy efficiency home improvements that was in effect in tax years 2006 and 2007 may utilize the unused portion in 2009, the IRS has informed the Alliance to Save Energy. Please consult your tax advisor for details.

What’s New:

  • The consumer tax credits for energy-efficiency home improvements have been revived with a few tweaks for the calendar year 2009. To be eligible, most qualifying products must be purchased and installed between January 1 and December 31, 2009. There also are some new eligible products. Please see below for additional details. Efforts to have Congress further extend the consumer tax credits continue! This web page will be updated to reflect any new legislation.

Energy Efficiency Can Lower Your Federal Tax Bill as Well as Your Energy Bills

  1. Introduction to Tax Credits
  2. Consumer Tax Credit Information
  3. Hybrid and Diesel Vehicle Tax Credit
  4. Home Energy-Efficiency Improvement Tax Credit
  5. Geothermal Heat Pumps, Solar Energy, and Fuel Cells
  6. Additional Information

http://www.dsireusa.org/library/includes/incentive2.cfm?Incentive_Code=US41F&State=Federal¤tpageid=1&ee=1&re=1

Federal Incentives for Renewables and Efficiency

Energy-Efficient New Homes Tax Credit for Home Builders

Last DSIRE Review: 10/09/2008

Incentive Type: Corporate Tax Credit
Eligible Efficiency Technologies: Comprehensive Measures/Whole Building
Applicable Sectors: Construction
Amount: $1,000-$2,000, depending on energy savings and home type
Maximum Incentive: $2,000
Website: http://www.irs.gov/
businesses/small/industries/article/0,,id=155445,00.html
Authority 1: 26 USC § 45L
Date Enacted: 8/8/2005 (Amended 2008)
Effective Date: 1/1/2006
Expiration Date: 12/31/2009
Authority 2: H.R. 1424: Div. B, Sec. 304 (The Energy Improvement and Extension Act of 2008)
Date Enacted: 10/3/2008
Expiration Date: 12/31/2009

http://www.hud.gov/offices/hsg/sfh/eem/eemhog96.cfm

Energy Efficient Mortgage

Home Owner Guide

THE ENERGY EFFICIENT MORTGAGE means comfort and savings. When you are buying, selling, refinancing, or remodeling your home, you can increase your comfort and actually save money by using the Energy Efficient Mortgage (EEM). It is easy to use, federally recognized, and can be applied to most home mortgages. EEMs provide the borrower with special benefits when purchasing a home that is energy efficient, or can be made efficient through the installation of energy-saving improvements.

Home owners with lower utility bills have more money in their pocket each month. They can afford to allocate a larger portion of their income to housing expenses. If you have more cash, why not buy a better, more comfortable home? There are two options with the Energy Efficient Mortgage.

The TWO SIDES of the EEM COIN

Finance Energy Improvements!


Cost-effective energy-saving measures may be financed as part of the mortgage!


Increase Your Buying Power!


Stretch debt-to-income qualifying ratios on loans for energy-efficient homes!


WHO BENEFITS from the ENERGY EFFICIENT MORTGAGE?

Buyers:


Qualify for a larger loan on a better home!


Sellers:


Sell your home more quickly.


Remodelers/Refinancers:


Get all the EEM benefits without moving.


Pay for energy improvements easily, through your mortgage. Your lender can increase your loan to cover energy improvement costs. Monthly mortgage payments increase slightly, but you actually save money because your energy bills will be lower!

HERS, or Home Energy Rating Systems

A HERS report is similar to a miles-per-gallon rating on a car. HERS are programs which provide evaluations of an individual home’s energy-efficiency. A HERS report is prepared by a trained Energy Rater. Factors such as insulation, appliance efficiencies, window types, local climate, and utility rates are used to rate the home and calculate energy costs.

A HERS Report Includes:


Overall Rating Score of the house as it is.


Rating scores are between 1 and 100. Higher scores indicate greater efficiency. Cost-effective upgrades are those which will save more money through energy savings than they cost to install.

U.S. Department of Energy recommended Home Energy Ratings contain a numerical score from 1 to 100, a one to five star-plus rating, and the estimated energy costs. Higher scores indicate greater efficiency. Cost-effective upgrades are those which will save more money through energy savings than they cost to install.

A HERS rating usually costs between $300 and $800. This could be paid for by the buyer, seller, lender, or real estate agent. Sometimes the cost of the rating may be financed as part of the mortgage. No matter how the rating is paid for, it is a very good investment because an EEM could save you or your buyer hundreds of dollars each year.

:}

Seems like a lot doesn’t? The boat has a hole in it and he hands us 3 buckets. That is a recipe for one sunk boat.

:}

Green House Is Museum Piece In Chicago – To bad that is the only place that will take it in

So my question is why didn’t they build it next door and let a real family live in it?

http://abcnews.go.com/Technology/SmartHome/popup?id=6074047

Chicago’s Greenest Home

This is what green living looks like. To showcase the future of eco-friendly architecture, Chicago’s Museum of Science and Industry has built a three-story “green” home in its backyard. On display from May 8, 2008 to Jan. 4, 2009, the Smart Home: Green + Wired exhibit not only features sustainable design and recycled materials, it also includes cutting-edge “smart” technology. With help from Wired magazine, the exhibit incorporates automation systems that save homeowners time, reduce energy consumption and enhance entertainment. For more information, visit msismarthome.org.
(JB Spector/Museum of Science and Industry)

 ht_smart_home_081020_ssh.jpg

:}

Please see the entire story for the slide show. There are 13 pictures in all.

:}

 http://www.thedailygreen.com/green-homes/eco-friendly/chicago-green-building-exhibit-46010908

Yesterday, on its 75th anniversary, Chicago’s much-praised Museum of Science and Industry announced construction of a 2,500 square-foot green home, reports the Chicago Sun Times. The home, slated for the museum’s east lawn, is designed to be a showcase for green living.

The 2-bedroom, 2-bath pre-fabricated house will feature a number of green building designs, including a gray water recycling system that redirects filtered sink water into the toilets. The toilets will even have two buttons to save water when only a little is needed, something that will be quite familiar to many Australian and European visitors.

The home will also have cement siding, energy-efficient LED light fixtures, insulating triple-pane windows, landscaping chips made of peach pits, recycled ceramic tiles and a green roof. It will be powered by solar and wind energy.

This “Smart Home” is scheduled to open May 8 and run through January 2009. It will cost guests $10.

 smarthome-md.jpg

http://www.nahb.org/news_details.aspx?newsID=7865

 Called the mkSolaire™, the home features family-friendly interior architecture and shows some of the possibilities and benefits of energy-efficient heating, ventilation and air-conditioning systems and earth-friendly building materials.

The “Smart Home: Green + Wired” exhibit and home tours run through Jan. 4. Some detailed information on the exhibit and home features is available on the museum’s Web site.

The home was manufactured and put in place by All American Homes of Decatur, Ill. and designed by Michelle Kaufmann Designs of Oakland, Calif.

The exhibit illustrates why many in the green building movement are embracing modular building systems. Modular construction, with its efficient use of materials, labor and energy, has been environmentally friendly almost since its inception.

In addition, modular construction can shorten the construction cycle by as much or more than two-thirds when compared to conventional site construction – reducing energy usage during construction and potentially saving on financing.

 sept_23_bsc_home1.jpg

:}

Please note quoting the late great Robert Palmer: The lights are on but no one is home. Energy conservation and a model home right?

A Refridgerator That Uses No Electricity And No Greenhouse Gases – How cool would it be to own something patented by Einstein?

This recent article in the UK Guardian caught my attention. While I don’t post the whoooooooole thinggggggg because it really long, I include some other sites and some art.

http://www.guardian.co.uk/science/2008/sep/21/scienceofclimatechange.climatechange

Einstein fridge design can help global cooling

Scientists relaunch a 1930 invention that uses no electricity and would reduce greenhouse gases

An early invention by Albert Einstein has been rebuilt by scientists at Oxford University who are trying to develop an environmentally friendly refrigerator that runs without electricity.

Modern fridges are notoriously damaging to the environment. They work by compressing and expanding man-made greenhouse gases called freons – far more damaging that carbon dioxide – and are being manufactured in increasing numbers. Sales of fridges around the world are rising as demand increases in developing countries.

Now Malcolm McCulloch, an electrical engineer at Oxford who works on green technologies, is leading a three-year projectto develop more robust appliances that can be used in places without electricity. 

His team has completed a prototype of a type of fridge patented in 1930 by Einstein and his colleague, the Hungarian physicist Leo Szilard. It had no moving parts and used only pressurised gases to keep things cold. The design was partly used in the first domestic refrigerators, but the technology was abandoned when more efficient compressors became popular in the 1950s. That meant a switch to using freons.

Einstein and Szilard’s idea avoids the need for freons. It uses ammonia, butane and water and takes advantage of the fact that liquids boil at lower temperatures when the air pressure around them is lower. ‘If you go to the top of Mount Everest, water boils at a much lower temperature than it does when you’re at sea level and that’s because the pressure is much lower up there,’ said McCulloch.

At one side is the evaporator, a flask that contains butane. ‘If you introduce a new vapour above the butane, the liquid boiling temperature decreases and, as it boils off, it takes energy from the surroundings to do so,’ says McCulloch. ‘That’s what makes it cold.’

Pressurised gas fridges based around Einstein’s design were replaced by freon-compressor fridges partly because Einstein and Szilard’s design was not very efficient. But McCulloch thinks that by tweaking the design and replacing the types of gases used it will be possible to quadruple the efficiency. He also wants to take the idea further. The only energy input needed into the fridge is to heat a pump, and McCulloch has been working on powering this with solar energy.

‘No moving parts is a real benefit because it can carry on going without maintenance. This could have real applications in rural areas,’ he said.

McCulloch’s is not the only technology to improve the environmental credentials of fridges. Engineers working at a Cambridge-based start-up company, Camfridge, are using magnetic fields to cool things. ‘Our fridge works, from a conceptual point of view, in a similar way [to gas compressor fridges] but instead of using a gas we use a magnetic field and a special metal alloy,’ said managing director Neil Wilson

 http://www.overstock.com/Books-Movies-Music-Games/Einsteins-Refrigerator/401711/product.html?cid=123620&fp=F&ci_src=14110944&ci_sku=2823969

einstein.jpg 

Einstein’s Refrigerator

And Other Stories from the Flip Side of History

by Silverman, Steve

  • $9.95
  • $9.45
  • $0.50 (5%)
  • Paperback
  • 04/01/2001
  • 9780740714191
  • 2823969

:}

But think of the irony here, Einstein went from being a patent clerk to being a patent clerk. Or better yet he went from a patent clerk to being patented:

http://en.wikipedia.org/wiki/Einstein_refrigerator

 200px-einstein_refrigerator.png

From 1926 until 1933 Einstein and Szilárd collaborated on ways to improve home refrigeration technology. The two were motivated by contemporary newspaper reports of a Berlin family who had been killed when a seal in their refrigerator broke and leaked toxic fumes into their home. Einstein and Szilard proposed that a device without moving parts would eliminate the potential for seal failure, and explored practical applications for different refrigeration cycles. Einstein used the experience he had gained during his years at the Swiss Patent Office to apply for valid patents for their inventions in several countries, the two eventually being granted 45 patents in their names for three different models.

It has been suggested that most of the actual inventing was performed by Szilard, with Einstein merely acting as a consultant and helping with the patent-related paperwork. Additionally, Einstein’s name lent the research prestige and credibility.[1]

The refrigerator was not immediately put into commercial production, the most promising of their patents being quickly bought up by the Swedish company AB Electrolux to protect its refrigeration technology from competition. A few demonstration units were constructed from other patents.

The invention of Freon in 1930 rendered the vapour compression process the standard for refrigeration.

:}

Then there is view of the regular fridge:

http://nga.gov.au/Exhibition/Sculptureprize05/Detail.cfm?IRN=139757

german-art.jpg 

:}