Hot Rocks Report – Deep well geothermal update – whats up since the Earthquake

It always amazes me how boring the “Feeling Lucky” search is on google. It is supposed to evoke the sounds and site of Dirty Harry “Well, are you feeling luck punk”. But it is about as dazzling as well a good yawn. Hot Rocks – slang name for deep well geothermal energy extraction was once, well, as the name implies HOT. There were two major Hot Rocks projects going on at the time of my last report (I know I know I will put in a track back when I get the chance) sometime last year. But then there was an earthquake in Austria or Switzerland…where ever the European endeavor was and it all got real quiet. The Earthquake was blamed on the Deep Well Drilling, but i never saw definitive proof. So I typed in Hot Rocks at Feeling Lucky and got this:

http://hotrocksband.tripod.com/

stones.jpg

Hot Rocks Rolling Stones Tribute Show complete with the sound, the look and the energy!
‘Best in the Midwest’ as selected by
Paramount-Stones-Scorsese-!
Best of  the Burbs finalist 4x in Nitelife Magazine contest

A freaking cover band;

Just to remind everyone this is what the original report dealt with:

http://www.swissinfo.org/eng/front/detail/swissinfo.html?siteSect=105&sid=7407138

Geothermal project shakes Basel again

Related stories

Basel has been rocked by another earth tremor, this time measuring 3.1 on the Richter scale, centred on the site of a planned geothermal power plant.

This time buildings stood up to the force unlike the minor damage inflicted by a small earthquake in December that clocked a reading of 3.4. Nobody was hurt in either of the two incidents.

The latest tremor took place at 08.19 on Saturday, prompting around 40 residents to call the emergency services.

Work on the Deep Heat Mining project stopped last month following a series of tremors and will not resume until at least the end of January when experts are expected to conclude their analysis.

:}

Just to bring you up to what is happening:

http://www.caribbeannetnews.com/news-11991–35-35–.html

UWI finds no correlation between geothermal project and earthquakes on Nevis
Published on Wednesday, November 5, 2008  
CHARLESTOWN, Nevis: Chief Executive Office of West Indies Power (Nevis) Ltd, (WIP) Kerry McDonald expressed confidence in the University of the West Indies (UWI) Seismic Research Unit (SRU) scientific findings, which corroborated WIP scientific conclusion of no known correlation between the series of earthquakes which recently occurred on Nevis, and the approved geothermal project contracted to WIP.
Chief Executive Officer of West Indies Power Limited Kerry McDonald

In a joint press briefing held on Monday with Director and Manager of the Nevis Disaster Management Office Lester Blackett, Mcdonald cleared the air when he made the following statement and assured the people of Nevis that drilling activities were not linked to the earthquakes, another respected analysis by the regions research institution studying volcanic and earthquake activity at Arc-level.

“The drilling WIP has been doing on the west side of the Island had nothing to do with the earthquake that occurred. First of all, let me say that there was no correlation between the two activities.

“In fact, we were not drilling for over one week on the west side of the Island. As you know, this earthquake was 11 miles off of the eastern side of the island close to the tectonic plate, where all the seismic activity has been and that’s pretty much the same region that all seismic activity that has affected Nevis has been located and that included the 1952 earthquake. This earthquake was at 22 miles depth and this was where the earthquake came from. The deepest well that we [WIP] have drilled is 3,720 feet,” McDonald said.

:}

They seem to be going great guns in Australia though

http://www.hotrockltd.com/irm/Content/home.html

   
Clean electricity at competitive rates  


Hot Rock Limited – Clean electricity at competitive cost

The world is poised for a major expansion in geothermal generation.  Geothermal uses natural heat from the Earth’s crust to make electricity.  It is clean and has high growth potential.
We created Hot Rock Limited to be a leader in geothermal generation.  Geothermal is a unique intersection of natural resource development with electricity generation.
Hot Rock Limited is the largest holder of geothermal exploration acreage in Australia.

Otway Basin geothermal project, Victoria, Australia

Hot Rock Limited’s Otway Basin geothermal resources in Victoria are large. They are located in the middle of a large population base of 5 million people with a major 500 kV electrical transmission system nearby. Hot Rock has already completed the largest MT geophysical survey for geothermal to date in Australia over a part of this resource. More

Why geothermal?

The world is readily embracing new clean energy sources. We have seen rapid growth in wind generation and coal seam gas production over the past decade. Geothermal electricity generation is now poised to grow rapidly too. More

http://www.spectrum.ieee.org/jan09/7077

Geodynamics is turning Australia’s natural radioactivity into the country’s first geothermal power plants

This is part of IEEE Spectrum‘s SPECIAL REPORT: WINNERS & LOSERS 2009, The Year’s Best and Worst of Technology.

Photo: Geodynamics

Dream Steam: A new kind of geothermal system in Australia’s desert holds great promise for clean electricity generation.

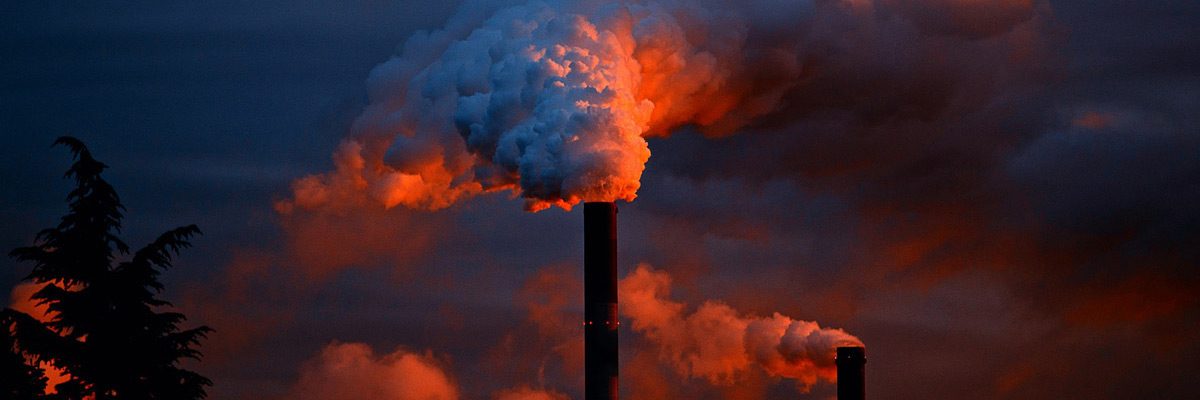
Four kilometers down below the orange earth of Australia’s Cooper Basin lies some of the hottest nonvolcanic rock in the world—rock that the geothermal industry had never seriously considered using to make electricity. But next month Geodynamics, an eight-year-old company based in Milton, Queensland, will prove otherwise when it turns on its 1?megawatt pilot plant here. The company has done more to harness this unconventional form of geothermal energy than anyone else in the world.

Geodynamics picked a place in the middle of Australia with a smattering of trees, a mostly dry riverbed, and a town with a population of about 14. Even in the best circumstances, building a geothermal power plant is a risky endeavor: drilling costs money, and divining what’s going on in the depths of the Earth is still something of a black art. Here, geothermal companies must clear yet another hurdle. The world’s 10 000-MW collection of geothermal power plants exploits existing underground reservoirs of water and steam. Australia’s geoscientists, by contrast, must create their own.

This very experimental technology is known as an engineered geothermal system, or EGS. If it works—and the finances and expertise at Geodynamics’ disposal suggest that it will—heat from deep under the outback could contribute a few gigawatts of clean round-the-clock power, up to 20 percent of Australia’s capacity today. And if it works here, many other countries will want to give it a whirl.

In the last few years, the concept of geothermal energy has undergone a dramatic reshaping to include a broad range of geological conditions not normally deemed useful. In the United States, for example, EGS could potentially contribute as much as 100 000 MW of electricity in the next 50 years, according to an MIT report released in 2006. Today conventional geothermal capacity in the United States amounts to about 3000 MW, less than half of a percent of the country’s total electric capacity. In famously geothermal Iceland it comes to 450 MW—about one-fourth of the island’s total. Australia’s use of geothermal heat is basically nil.

:}

Good luck mates.

:}

Alexander J. Casella – Good bye old friend. It was a great 30 years

I started in the anti-nuke tradition in the Prairie Alliance when I was 14 years old. We marched and protested a lot against Clinton Nuclear Power Plant. When I turned 19 some of us filed lawsuits against rate basing cost overruns. Those suits wound through the courts for years. The first one coming in against Clinton in 1978, the year I met Al at what was then Sangamon State University. The first time we talked and I told him what I was into, he laughed and said, “What does that have to do with Public Policy.” I was a Psych. student then and it kinda pissed me off. But the more we talked the more I saw that it takes Public Policy well implemented to really change how we treat the Earth. Thank God he lived to see Obama elected. God speed Al.

Casella, Alexander J.
   
SPRINGFIELD – Alexander “Alex” Joseph Casella, 69, died Thursday, March 5, 2009, at his home in Springfield.Alex was born August 10, 1939, in Taylor, PA, the son of Alexander Joseph Casella Sr. and Josephine M. Cesare Casella. He married Thanawan Kohrianchai on July 1, 2001, in Springfield, Illinois.Alex grew up in Moosic, PA. He received a B.S. in Physics from Villanova University, an M.A. in Physics from Drexel University, and a Ph.D. in Physics from Pennsylvania State University. He began his professional career in 1961 as a Physicist for the U.S. Dept. of Defense at the Frankford Arsenal in Philadelphia. In 1969, he became a professor of Physics at Jacksonville University in Florida. Alex embarked on a 30 year career in 1973 with Sangamon State University/UIS as Professor of Environmental Studies and Physics. He became the Director of Energy Studies at SSU in 1975. From 1989-1996, Alex served as Dean of the School of Public Affairs and Administration. In 2002, he became Professor Emeritus, Environmental Studies and Physics.Alex was the producer and host of about fifty, half-hour interview shows on environment/energy issues starting in 1985. He also hosted two weekly interview shows, “Faculty Focus” and “Peace Talks.”Alex was a member of Sigma Pi Sigma, Illinois Environmental Council, American Assoc. for the Advancement of Science, Union of Concerned Scientists (IL Coordinator), Sierra Club, Charter Member of Better World Society and Worldwatch Institute. He served on numerous boards and committees, including Energy Consultants Associates, Earth Week 1990, Springfield Urban League, and Springfield Area Arts Council. He provided numerous testimonies to committees of the State of IL House and Senate in areas of Energy Policy and was the prolific author of articles, papers, lectures, and letters to the editor on numerous and sundry topics.A loyal supporter of the Democratic Party, Alex ran for Alderman of Ward 7 in 1999, victory narrowly eluding him by a mere 8%.

Among Alex’s great and varied interests was a love of photography, gardening, debunking myths with science, movies, the ocean, playing with his grandson, Italian food, sports and writing. He loved the performing arts, and even acted in One Flew Over the Cuckoo’s Nest and Of Mice And Men at the Springfield Theatre Center. Alex’s generous spirit, sympathetic ear, and pragmatic advice touched many people along his way. His children brought him great joy. He was very proud of his grandson, Jonah, and newly smitten with his baby granddaughter, Virginia. Alex also loved traveling and meeting new people. He traveled extensively throughout Europe, Asia, and the United States. It was during one notable trip to Bangkok in the fall of 2000 that he met and fell in love with Thanawan Kohrianchai.

Alex was preceded in death by his parents and by his sister, Cynthia Norton.

Alex is survived by his wife, Thanawan; son, Christopher, Hermosa Beach, CA; daughter, Lara Parkes (husband, Michael), Springfield; grandson, Jonah; granddaughter, Virginia; nephew, Thomas Norton; nieces, Mary Jo Christiansen and Cynthia Warren; great-nieces and nephews, all of New Jersey.

Memorial service will be held from 5:00-7:00 p.m., Monday, March 16th at Kirlin-Egan & Butler Funeral Home, 900 S. 6th St., Springfield. Memories will be shared at 7:00 p.m.

Memorial contributions may be made to the Christian Children’s Fund, 2821 Emerywood Pkwy, Richmond, VA 23294, World Wildlife Fund, 1250 24th St., NW, PO Box 97180, Washington, D.C. 20090, Pattaya Orphanage Trust, www.thaichildrenstrust.org, or the charity of one’s choice.

Father, Husband, Teacher, Friend: Alex, we will miss you.

Please visit Alex’s online life story at www.butlerfuneralhomes.com to offer your condolences.

Published in The State Journal-Register on 3/14/2009

Saving The World By Starting A Garden – Think about the advantages of getting your hands dirty

To sum up and add some odd thoughts that do not fit well anywhere else. The reason that eating locally beginning with growing your own vegetables is that the corporate farms ship food around the world. Raspberries from Chile, Peppers to China, and Bananas from Central America…Not to mention coffee from everywhere. All this takes incredible amounts of energy, to the point where we are literally drinking oil. This is just wrong. I could go on about how, it is good for you and tons of other stuff but this column’s about energy.

http://www.nytimes.com/2008/04/26/business/worldbusiness/26food.html

Environmental Cost of

Shipping Groceries Around the World

Published: April 26, 2008

Correction Appended

Cod caught off Norway is shipped to China to be turned into filets, then shipped back to Norway for sale. Argentine lemons fill supermarket shelves on the Citrus Coast of Spain, as local lemons rot on the ground. Half of Europe’s peas are grown and packaged in Kenya.

In the United States, FreshDirect proclaims kiwi season has expanded to “All year!” now that Italy has become the world’s leading supplier of New Zealand’s national fruit, taking over in the Southern Hemisphere’s winter.

Food has moved around the world since Europeans brought tea from China, but never at the speed or in the amounts it has over the last few years. Consumers in not only the richest nations but, increasingly, the developing world expect food whenever they crave it, with no concession to season or geography.

http://www.iptv.org/mtom/story.cfm?Lid=358

The Cost Of Food Transportation

The creation and implementation of the Department of Homeland Security has intensified the quest to make the nation’s food supply more secure.

That effort along with consumer demand is encouraging the development of an alternative agricultural economy, one that is less dependent upon imports.

Advocates of the local food movement argue that sourcing food grown closer to home would avoid the potential of terrorist contamination.

They also note a more intensive local food economy would conserve much of the massive amount of energy that is currently expended to transport food.

A visit to the local Midwest grocery store which sells tangerines from South Africa, apples from New Zealand, boxes of bananas from Costa Rica and asparagus from Mexico confirms it is truly a global marketplace.

Even for grapes grown in the U.S., the produce can still be trucked hundreds of miles to Midwest or East Coast markets.

:}

If you have extra produce donate it to the local foodbank:

 http://countrylife.lehmans.com/2008/10/08/extra-produce/

Extra Garden Produce? Bank It and Make a Difference

Posted October 8th, 2008 by Dori Fritzinger

We have all been there. Our little garden produces great big yields, more than we can use. You have canned all your

pantry (and you) can handle, and


given away enough that your family and neighbors hide when you come to their door with vegetables. Do not let that last fresh produce spoil! Donate it to your local food bank!


Call your local food bank and ask if it takes fresh produce donations. If so, find out on what days and times. If not, ask if they have the number of a local charity that does. Times are hard all over, with prices rising like they are, and we can each do a little to help. Believe it or not, it adds up and can truly make a great difference in someone’s life.


Pick your produce fresh the day you plan to deliver it. Wash it well. Pick through and discard spoiled pieces or parts. Place your produce in containers that will be easy to lift and carry. If you can leave the containers, it will save time for the charity volunteers and you. With a permanent magic marker write your name, address, and phone number on the bottom to identify your baskets. Many food banks will hold onto your containers and give them back empty when you stop in again.


:}

If you have extra produce, sell it or barter it at a local Farmer’s Market:

 http://www.extension.iastate.edu/news/2008/jul/110301.htm

Should You Sell Your Extra Produce at a Farmers’ Market?

7/2/2008

By Andy Larson
Small Farms Specialist
Iowa State University Extension


We are approaching that time of year when Iowa home gardeners have more tomatoes, green beans and zucchini than they can use. The recent buzz about local foods makes you wonder, “Could I make a few bucks selling my extra produce at a farmers’ market?”


The answer may not be as simple as you think…

The number of farmers’ markets has skyrocketed, but few markets are so loosely organized that they allow anyone with a vehicle and a table to sell food. Most markets are administered by a market association with a market master who can provide rules as well as a vendor application.


Market documents should detail

  • hours and season of operation,

  • what kind of vendors may sell and whether they may sell only products they produce,

  • what types of products may be sold,
    necessary permits or licenses required, and

  • the schedule of fees.

Guidelines are established with the safety of the customer and the character of the farmers’ market in mind.

Occasional selling at farmers’ market
Some markets have daily vendor rates. There are a few things to consider before spending six or seven hours of your weekend trying to sell excess produce.


:}

Give it or sell it to a local grocery store.


http://chowhound.chow.com/topics/588162

Grocery stores that sell local produce in NYC?

I try to get to GreenMarket a couple times a week, but since I mostly only have nights free I don’t get to the farmer’s markets nearly as often as I’d like. I’m new to the city and am wondering if anyone knows of grocery stores (preferably in the East Village area, but not necessary) where I can buy local, organic produce and meats. The only local produce Whole Foods on 14th has right now is onions… Thanks for the help.

:}

Give it directly to the poor themselves. That’s right find a poor family and give it to them. OR go to a social service agency and have them match you up to a family.

ODDs and INS

Do not burn your YARD WASTE, including garden clutter! Please pretty please…

Seeds from last year – toss them in the river or by the roadside. Give them a chance to grow. I toss sunflower seeds in my compost pile and they go nuts all summer long.

Buy a good juicer and use it. No cooking and very little prep-time. Health. It is a no brainer.

Don’t forget the herbs. Open your pantry door and take out all of that rosemary, oregano, sage, thyme, parsley, cilantro, dumb garlic products, and many other herbs. Throw them on the compost pile. Fresh is BEST.

:}

Gardening And The Environment – If it saves energy it must be good.

So Fall is falling, and much of your garden is either dead, bolted or in weeds. It is September and your thoughts turn to hunting or downhill skiing. If it is your first garden and you are tired, wash, sharpen and stow your tools. Store your seeds in a dark dry place and enjoy the fruits of your labor.

www.eugenehomeshow.com

tools1.jpg

www.uwex.edu/…/hort/GardeningTidbits.html

Fall Checklist
•Clean and lightly oil your shovels and spades to prevent rust.
•Sharpen your hoes, pruning equipment and saws.
•Drain your watering equipment.
•Clean and service your lawn mower and tiller.

tools.jpg

http://www.ehow.com/how_10814_clean-store-gardening.html&usg

How to Clean and

Store Gardening Tools for the Winter

Putting garden tools away properly for the winter can add years to the life of your equipment. Your tools will be protected from rust and wear, and better yet, they’ll be ready to go the moment spring fever hits on that first balmy day next year.

tools2.jpg

But if you ARE a vegitarian:

http://bizarrocomic.blogspot.com/

OR you really got into the gardening experience:

http://www.rejoicerejoice.com

Then it is time for fall or late season Gardening. Almost everything that you planted in the Spring you can plant in the fall:

http://www.ces.ncsu.edu/depts/hort/hil/hil-8001.html

Growing a Fall Vegetable GardenRevised 1/99 — Author Reviewed 2/99 HIL-8100
Erv Evans, Extension Horticultural Specialist
Department of Horticultural Science

Many vegetables are well adapted to planting in the summer for fall harvest. Planting a fall garden will extend the gardening season so you can continue to harvest fresh produce after earlier crops have finished. The fall harvest can be extended even further by providing protection from early frosts or by planting in cold frames or hotbeds.

Many cool-season vegetables, such as carrots, broccoli, cauliflower, and Brussels sprouts, produce their best flavor and quality when they mature during cool weather. In North Carolina, the spring temperatures often heat up quickly. Vegetables, such as lettuce and spinach, tend to bolt or develop bitter flavor when they mature during hot summer weather.

Growing a productive fall vegetable garden requires thoughtful planning and good cultural practices. July and August are the main planting times for the fall garden. Table 1 provides recommended planting dates. Vegetables that have a 60 to 80 day maturity cycle should be planted around August 1 in the piedmont. Planting of quick maturing vegetables, such as turnips and leafy greens, can be delayed until September. Keep in mind that the planting dates can be as much as 7 to 10 days earlier in western North Carolina and 7 to 10 days later in the eastern North Carolina. Be sure to adjust the planting dates for your specific location. For a more accurate planting schedule, consult Figure 1 to determine the average date of the first killing frost in the fall. Count backwards from the frost date, using the number of days to maturity to determine the best time to plant in your area.

http://www.lowescreativeideas.com/idea-library/articles/Vegetable_Gardens_0908.aspx

Know Your Season

Vegetable plants can be classified as either cool- or warm-season crops, named for whether they prefer cool or warm weather. Examples of cool-season crops are lettuce, greens, peas, onions, broccoli, brussels sprouts, beets, carrots, and potatoes. Most cool-season vegetables can withstand a light frost, and some, such as collards and kale, can tolerate 20° Fahrenheit temperatures. Types of warm-season crops include beans, melons, peppers, tomatoes, okra, eggplants, squash, and corn. These are very sensitive to cold and must be planted in the spring after all danger of frost has passed. Their harvest will come to an end with the first frost of fall.
Depending on where you live and the length of your growing season, you will either have lots of warm-season vegetables or lots of cool-season vegetables, but either way, you’ll have lots of veggies. Your local Lowe’s Garden Center will sell plants at the appropriate planting time. Warm-season veggies are available in spring, cool-season veggies generally in early spring. In southernmost areas where winters are mild enough to allow a cool-season garden in the fall, cool-season veggies are available in late summer and fall.

Sketch a Plan

When designing your garden this fall, map out the location of cool-season crops first because you will be starting with these. Consider where your spring crops will grow as well. Place the tallest plants on the northern side of your vegetable garden so that they don’t shadow other plants. Practice succession planting: As a cool-season crop finishes, pull it, and plant a warm-season crop in its place. Or surround one crop with another that you’ll harvest first, as long as their growth habits don’t choke each other out. For example, plant bush beans in a 3-foot-diameter circle around tomato plants. You’ll harvest the beans as the taller tomato vines fill out. You also can practice succession planting with any crop that has a limited harvest season. For instance, plant bush beans, radishes, beets, corn, or carrots every two weeks during the appropriate growing season.

Consider Irrigation

Vegetables are about 90 percent water, so it’s vital to water crops. An overhead sprinkler does an effective job, as long as you water very early in the morning. This will allow leaves to dry early, in the same way that dew dries. Keeping leaves dry overnight will help prevent diseases.

Soaker hoses and drip irrigation efficiently deliver water directly to soil and plant roots. In municipalities with watering restrictions, opt for soaker hoses or drip-irrigation methods, which are regulated differently from overhead watering.

In very warm zones, such as Florida and California, irrigation is the secret to wonderful fall harvests. In all zones, mulch crops to conserve soil moisture. Use straw or pine straw, and it will add organic matter as it breaks down.

:}

Finally when it gets too cold, Dig up what you got and Bring it inside. I believe that tomatoes cooked in a big pot, and placed in a freezer will last all winter. I intend to find out later this year:

http://www.container-gardens.com/

Container Gardens as a place to Meditate

Benefits of Gardening in Containers: Do you live in an apartment complex where digging up a little sod is out of the question? Or, maybe you just don’t have the physical ability to tend a large garden, but still want the benefits and rewards of having one. like having a spiritual retreat for meditation? Techniques for meditating vary, but there is no better place to meditate than your own garden. Have you considered container gardening?

Container gardening is simply growing your garden in – you guessed it – containers! It was born of a strong desire, and in some cases a need, to produce herbs, vegetables, and flowers within a limited amount of space and/or poor soil conditions, all which can be controlled by gardening in containers.

Container gardening can be beneficial for many individuals and situations:

• The disabled and the elderly – container gardening offers easy access.
• Problem soil – containers allow you to control your own high-quality soil.
• Space – Container Gardens utilize minimal space.
• Apartments/Condos – addresses limited access to garden plots.
• Gourmet cooking – easily grow fresh herbs and vegetables for cooking.
• Plant enthusiasts – for those who just can’t get enough gardening!
• Mobility – container gardens are easy to move around as needed.
• Convenience. Keeps your flowers, vegetables, or herbs close at hand.

:}

Energy Efficient Gardening – To blanch or not to blanch that is the question

I put everything I want to preserve in the freezer. Yes that is correct. I have two 5 gallon freezer bags full of tomatoes left in the freezer from last year. Many Earth minded friends are unsure how to take that. It is a small horizontal, maybe 3 x 3 x 2 ft. freezer in my basement. It uses energy, not a lot but more than it would take to dry them or maybe even can them. Though the jury is out on green beans, corn and other sweet starchy vegetables. You have to cook them a loooong time to get them to keep. Yes it is true that canned goods last a much longer time and can be much more easily transported. It is true that we even have a pressure canner that we use periodically, mostly for fruit and quick jams :} :} UMMMM good. Our winters are only 6 months long at the most. Global warming will make that even shorter so I am back out in the garden before we run out. Frankly there are enough squash to drowned in and yes I end up throwing some out. I am just not in survivalist mode right now. Freezing is easy. So to cook before or not? Everything should be thoroughly washed and dry as possible. Anthrax and botulism occur naturally and in most locals so this is really important.

But what happens next is well up to you. Thousands of people have their own opinions too. This lady is a cooker:

http://www.gardenguides.com/how-to/tipstechniques/vegetables/freezing.asp

Artichoke, Globe Remove outer leaves. Wash and trim stalks. Remove “chokes” and blanch, a few at a time, for 7 minutes. Cool in iced water for 7 minutes. Drain. Pack in freezer bags, seal and label. Keeps up to 6 months.
Artichoke, Jerusalem Peel and slice. Place in cold water with the juice of a lemon to prevent discoloration. Blanch for 2 minutes in boiling water. Cool in iced water for 2 minutes. Drain and place on tray in a single layer. Freeze for 30 minutes. Transfer to freezer bags, remove air, label and seal. Keeps for 6 months.
Asparagus Wash and remove woody portions and scales of spears. Cut into 6 inch lengths and blanch in boiling water for 3 minutes. Cool in iced water for 3 minutes. Drain. Place on trays in a single layer and freeze for 30 minutes. Pack into suitable containers, seal and label. Keeps up to 6 months.
Beans, Broad Shell and wash. Blanch in boiling water for 1½ minutes. Cool in iced water for 1-2 minutes. Place on tray in a single layer and freeze for 30 minutes. Pack into freezer bags, remove air, seal and label. Keeps up to 6 months.

:}

This site lists 46  different vegetables and some herbs. No green beans though. Much as everyone loves them. Preserving them is not for the faint of heart. For one thing they are going to be mushy. Cook them with green unions and bell peppers and then freeze them. They are going to be mushy. Tasty but mushy. Can them with small unions (and a big nonono a tiny little bit of bacon) mild banana peppers and delicate slices of pimento or tomato. They will be tasty. But they will be mushy. I just used about a quart of them in a green bean casserole and they were not bad. I personally think that finding green bean recipes that cook the heck out of them are best like for stews and hearty soups. This the only real solution cause the only way to have crisp sweet green beans, unfortunately, is to pick them and eat them. If you are in survival mode that ain’t even a question. This lady is a cooker too:

http://southernfood.about.com/od/freezingfood/a/aa082101.htm

Blanching and packing vegetables for the freezer

Preparation and Blanching Times for Specific Vegetables

If you’re lucky enough to have freezer space, most vegetables freeze quite well. Some vegetable varieties do freeze better than others, and it’s almost always best to use the youngest and most tender of your crop. Here are some basic instructions, along with preparation and freezing instructions for individual vegetables. Blanching
Blanching is an important step. The enzymes which cause vegetables to lose color and flavor will continue even after the vegetables are frozen. Blanching stops these enzymes. Most vegetables are blanched in boiling water, but steam works well with a few. There are exceptions; some vegetables must be fully cooked and a few can be frozen raw and unblanched.

Blanching in Boiling Water

Fill a large kettle with 1 gallon of water or more; bring water to a brisk boil. Blanch no more than 1 pound of vegetables per 1 gallon of water at a time. Use a basket, strainer or cheesecloth (bundle a pound or less of vegetables in the cheesecloth) to submerge vegetables in the boiling water. If the water doesn’t return to a boil in about 1 minute, use a smaller amount the next batch. Cover the pot and boil for the specified time (see individual vegetables, below) then remove quickly and submerge a large bowl or deep pot of water and ice to cool quickly and stop the cooking. When vegetables are thoroughly chilled, remove, drain and pat dry. Keep chilled in the refrigerator if they will not be packed immediately.

Blanching in Steam

Use a large kettle with a rack. It should hold the vegetables over about 1 1/2 to 2 inches of water. Bring the water to a boil, put vegetables in the basket in a single layer. Cover the kettle and keep the heat high for the specified amount of time. Remove to ice water immediately; chill thoroughly, drain and pat dry. Keep chilled in the refrigerator if they will not be packed immediately.

Packing

You can pack the chilled vegetables right in the containers, but dry packing will help to prevent clumping and make it easier to use small amounts from containers. Arrange blanched, chilled vegetables on a baking sheet or tray in a single layer. Freeze at -20° F., or as quickly as your freezer will allow. Once frozen, pack in freezer containers or bags.

:}

Finally this lady is pretty complete too:

http://www.helpwithcooking.com/food-storage/freezing-vegetables.html

But you know me. I love the equipment. So what does a really efficient horizontal stand alone freezer look like?
http://www.buildinggreen.com/auth/productsByCsiSection.cfm?SubBuilderCategoryID=6919

Green Product Sub-category:

Residential Refrigerators and Freezers

The energy efficiency of refrigerators has improved dramatically in the last several decades. National standards have helped reduce the energy use of refrigerators to less than one-third that of pre-1973 models; and since 2001, the energy use of conventional refrigerators has dropped by 40%. Developments in refrigerator design, including increased insulation, tighter door seals, and more efficient compressors, are continuing that trend. Different options and freezer compartment configurations affect energy use. A side-by-side refrigerator-freezer with such amenities as through-the-door ice service and automatic defrost may use nearly 40% more energy than a top-freezer, manual-defrost, basic model. On a per-volume basis (cubic feet of interior space), compact refrigerators typically use significantly more energy than their larger counterparts. Energy Star qualified refrigerators and freezers exceed the current federal minimum standard by at least 20% and 10%, respectively, but the minimum standard varies by size and feature, so two Energy Star-qualified refrigerators can have dramatically different energy consumption and per-volume efficiency. Because models change rapidly, the best way to find a top-efficiency product is to (1) figure out how large a model and which features are really needed, (2) look for the Energy Star logo on models that satisfy user needs, and (3) use the yellow EnergyGuide label to compare the kWh per year consumption of models meeting user needs and choose the model with the lowest energy use. One large appliance is almost always more efficient than two smaller ones, and if getting a new larger refrigerator leads to unplugging a partly full old refrigerator or freezer, the benefit is even greater.

Product lines listed here are from companies with numerous models that exceed Energy Star requirements by at least a few percentage points; these brands are a good place to start when seeking out efficient products from retail outlets. Also included are super-efficient refrigerators that are usually sold for use in off-grid houses; these generally haven’t qualified for Energy Star because the companies are too small or their markets too small to justify their submitting products for testing.

:}

It may not be the Sears Tower anymore but they still make great stuff:

http://www.sears.com/shc/s/c_10153_12605_Appliances_Freezers+%26+Ice+Makers?psid=21769120&sid=ISx20070515x00001a

freezer.jpg

Kenmore 5.0 cu. ft. Manual Defrost Chest…

Reg Price: $209.99

Savings: $31.50

You Pay: $178.49

:}

Energy Saving Gardening – What a lot of work

Here is where we separate the real gardeners from those with a passing interest. This one word scares the bejesus out of most people who are unfamiliar with the process. CANNING. But modern appliances and some shortcuts have made it a lot easier to do.

http://www.homecanning.com/

www.pickyourown.org/allaboutcanning.htm

foodsafety.psu.edu/canningguide.html

http://www.uga.edu/nchfp/how/general.html

There are BOATLOADS of places that push canning and other cooking methods of food prep for long term storage. This takes energy, and your bills will reflect it. But when you add up those bills and compare them to what you save on your food bills, you will save a ton of money. Plus you are not drinking oil. IT’s healthy. But it is hot and it is a lot of work.

:}


General Canning Information

How Canning Preserves Foods

The high percentage of water in most fresh foods makes them very perishable. They spoil or lose their quality for several reasons:

  • growth of undesirable microorganisms-bacteria, molds, and yeasts,
  • activity of food enzymes,
  • reactions with oxygen,
  • moisture loss.

Microorganisms live and multiply quickly on the surfaces of fresh food and on the inside of bruised, insect-damaged, and diseased food. Oxygen and enzymes are present throughout fresh food tissues.

Proper canning practices include:

  • carefully selecting and washing fresh food,
  • peeling some fresh foods,
  • hot packing many foods,
  • adding acids (lemon juice or vinegar) to some foods,
  • using acceptable jars and self-sealing lids,
  • processing jars in a boiling-water or pressure canner for the correct period of time.

Collectively, these practices remove oxygen; destroy enzymes; prevent the growth of undesirable bacteria, yeasts, and molds; and help form a high vacuum in jars. Good vacuums form tight seals which keep liquid in and air and microorganisms out.

OK, I need a canner?  Why types are there?

Equipment for heat-processing home-canned food is of two main types–boiling-water canners and pressure canners. There are many other types which are NOT recommended by the authorities (see this page for more about obsolete and unsafe canning methods)

Most are designed to hold seven quart jars or eight to nine pints. Small pressure canners hold four quart jars; some large pressure canners hold 18 pint jars in two layers, but hold only seven quart jars. Pressure saucepans with smaller volume capacities are not recommended for use in canning. Small capacity pressure canners are treated in a similar manner as standard larger canners, and should be vented using the typical venting procedures.

Low-acid foods must be processed in a pressure canner to be free of botulism risksThis is because botulism-producing bacteria produce spores that can survive boiling water temperatures, but are destroyed using a pressure canner with the appropriate time and pressure, which reaches temperatures between 240 and 250 degrees F.  Low-acid foods include meats, dairy, sea food, poultry, all vegetables (except tomatoes) and many fruits (notably figs).  Be sure to see this page for a detailed list of the  Acid content of common fruits and vegetables.

 Higher acid foods (and those which have been acidified and tested) that may be safely canned in a boiling water bath canner include jams, jellies, pickles, applesauce, apple butter, peaches, peach butter, pears, pear butter, spaghetti sauce without meat, tomatoes, ketchup and tomatoes.

Which Type of Canner Should I Get

There are advantages and disadvantages of Pressure and Boiling Water Bath Canners.  Which is best for you depends upon what you want to can and your budget.

Water bath canners are faster for higher acid foods

Although pressure canners may also be used for processing higher acid foods, boiling-water canners are recommended for this purpose because they are faster. A pressure canner would require from 55 to 100 minutes to process a load of jars; while the total time for processing most acid foods in boiling water varies from 25 to 60 minutes. A boiling-water canner loaded with filled jars requires about 20 to 30 minutes of heating before its water begins to boil.

A loaded pressure canner requires about

  • 12 to 15 minutes of heating before it begins to vent;
  • another 10 minutes to vent the canner;
  • another 5 minutes to pressurize the canner;
  • another 8 to 10 minutes to process the acid food; and, finally,
  • another 20 to 60 minutes to cool the canner before removing jars.

But Water Bath Canners cannot be used for meats, dairy, sea food, poultry, vegetables and many fruits.

And the food quality and storage time is better with a pressure canner.  Because they get hotter (240F vs 180F-212F) pressure canners result in a better flavor and the ability for to store for a longer time.

A pressure canner can be used as a boiling water bath canner, just remove the gauge and weight.  That way you have 2 canners in one!

Conclusion: Pressure canners cost more to buy, but ultimately, you can “can” more foods in them, store the foods longer, and use the same canner as a pressure canner or without sealing the lid, as a boiling water bath canner.

See this page for a selection of pressure canners at excellent prices, and this link for boiling water bath canners

You can also find free information about canners from the USDA in this PDF file (it will take a while to load!) about selecting and using canners here!

:}

One of the few get to it guides:

http://www-podunk.com/home-canning-guide.html

Sugar and Salt

Sugar helps retain the color, shape and texture of canned fruits. Sugar is usually added as a syrup. To make syrup, pour 4 cups of water into a saucepan and add:

  • 2 cups of sugar to make 5 cups of thin syrup or
  • 3 cups of sugar to make 5 ý cups of medium syrup or
  • 4 1/4 cups of sugar to make 6 ý cups of heavy syrup.

Heat until the sugar dissolves. Make 1 to 1 ý cups of syrup for each quart of fruit. Up to half the sugar used in making syrup can be replaced with light corn syrup or mild-flavored honey. Fruits also can be safely canned without sugar. Pack the fruit in extracted juice, in juice from another fruit (such as bottled apple juice, pineapple juice, or white grape juice) or in water.Salt may be added to vegetables and tomatoes before canning. Since its only function is flavor, it can safely be omitted. Canning fruits and vegetables without adding sugar or salt does not affect processing times or microbiological safety.

Packing Instructions

The two methods of packing, food into canning jars are raw pack and hot pack. Raw pack is packing raw, prepared food into clean, hot jars and then adding hot liquid. Fruits and most vegetables need to be packed tightly because they will shrink during processing. However, raw corn, lima beans, and peas should be packed loosely, as they will expand. For hot pack, heat prepared food to boiling, or partially cook it. It should be packed loosely boiling, hot into clean, hot jars. Hot pack takes more time but has been found to result in higher quality canned foods. For either packing, method, pack acid foods including tomatoes and acidified figs to within ý-inch of the top of the jar. Low acid foods to within 1 inch of the top of the jar. After food is packed into jars, wipe the jar rims clean. Put on the lid with the sealing compound next to the jar rim. Screw the band down firmly so that it is hand-tight. Do not use a far wrench to tighten screw bands. There must be enough “give” for air to escape from the jars during, processing. Process food promptly after packing it into jars and adjusting lids. Processing times are given for pints and quarts. If you are using half pint jars, use processing times for pints. For one-and-one-half pint jars, use processing times for quarts. Fruit juices are the only product that may be canned in half gallon jars.

Processing in a Water-Bath Canner

Use a water bath canner to process acidified tomatoes, acidified figs and all other fruits. A pressure canner can be used to process acid foods but the quality will not be as good.

  1. Fill the canner half full with water; then cover and heat. For raw-packed food, have the water hot but not boiling. For hot-packed food, have the water boiling
  2. Using a far lifter, place jars filled with food on the rack in the canner. If necessary, add boiling water to brine, water 1 to 2 inches over the tops of the jars. Do not pour boiling, water directly on jars. Cover.
  3. When water comes to a rolling boil, start counting the processing time. Keep water at a boil for the entire processing time. Add more boiling water to keep water I to 2 inches above jars.
  4. As soon as the processing time is up, use a jar lifter to remove jars from canner. If liquid boiled out of the jars during processing, do not open them to add more. Do not retighten screw bands, even if they are noticeably loose.

Processing in a Pressure Canner

If you live at an altitude of 0-1000 feet you can process foods in a weighted gauge pressure canner at 10 pounds pressure. If you are using, a dial gauge pressure canner, use 11 pounds pressure. If you live at an altitude more than 2,000 feet you need to increase the pounds pressure at which you process foods. These increases are not given in this bulletin. Contact your county extension center to get this information. If tomato products are acidified, they can be safely processed in a water bath canner. If not, they must be processed in a pressure canner.

Here are some pointers for using a pressure canner:

  1. Pour 2 or 3 inches of water in the bottom of the canner and heat to boiling.
  2. Set jars on the rack in the canner. If you have two layers of jars in the canner, use a rack between them and stagger the second layer.
  3. Fasten the canner cover securely so steam cannot escape except through the vent.
  4. Once steam pours steadily from vent, let it escape for 10 minutes to drive all air from the canner. During, processing, the canner must be filled with steam, not air, since it is steam that reaches the desired temperature of 240’F.
  5. If the canner has a weighted gauge, start counting the processing time when it jiggles or rocks. The target pressure for this type of canner is 10 pounds pressure. Adjust heat so that gauge jiggles 2 or 3 times a minute or maintains a slow, steady , rocking motion.
  6. If the canner has a dial gauge, bring pressure up quickly to 8 pounds, then adjust the heat to maintain 11 pounds pressure. Start counting the processing times when the gauge registers 11 pounds pressure.
  7. When the processing time is up, turn off the burner. (If you are using, a coal or wood stove, remove canner from heat.) Let the pressure in the canner drop to zero by itself. This may take 45 minutes in a 16-quart canner filled with jars and almost an hour in a 22-quart canner. If the vent is opened before the pressure drops to zero or if the cooling is rushed by running, cold water over the canner, liquid will be lost from the jars.
  8. When the pressure has dropped to zero, open the vent or remove the weighted gauge. (With a weighted gauge canner, pressure is completely reduced if no steam escapes when the gauge is nudged or tilted. If steam spurts out, pressure is not yet down.)
  9. Remove canner cover carefully, tilting it away from your face so that the rising steam cannot burn your face or hands.
  10. Remove jars from canner. If liquid boiled out of jars during processing, do not open jars to add more liquid. Do not retighten screw bands, even if they are noticeably loose.
  11. Place hot jars upright to cool on a towel or rack. Leave space between them so air can circulate. Keep jars our of drafts.

Check Seals

Vacuum seals form as the jars cool. When jars are cool (12 to 24 hours after processing), check the seals. If the lid is depressed or concave and will not move when pressed, it is sealed. If sealed, carefully remove screw bands. If a band sticks, loosen it by covering, it for a moment with a hot, damp cloth. Bands left on jars during storage may rust, making later removal difficult. If you find an unsealed jar, do one of the following:

  • Refrigerate the food and use it within 2 to 3 days.
  • Freeze the food. (Drain vegetables before freezing.)
  • Reprocess the food. Remove lids, empty the contents in to a pan, heat to boiling, pack into clean, hot jars, and put on new lids. Process again for the full time. The eating quality of twice-processed food may be poor. If more than 24 hours have gone by since processing, throw out the food. It might be unsafe to eat.

:}

I live in growing zone 5 which will not mean much to nongardeners. Draw a line from New Jersey to Central California. Draw another line from Georgia to Somewhere in mid Salinas Valley California and you just about have it. I bring this up because corporate foodies will say that when the garden harvest comes in, it comes in at the same time. So you will have thousands of canners firing up at the same time. This is a waste and they can do it “au masse” cheaper, faster and more efficiently. Of course then they have to transport it….AHHH they don’t really have an answer for that because shipping is not their cost. It is an externallity. Which is why corporate america should be kept away from our food supply. Very Far From Our Food Supply.

:}

Gardening To Save The Planet – It’s not just what you grow, it is what you do with it

Every gardener gets to the point where the produce is overwhelming. I am not even talking about having more garden than you need. I mean I DO have more garden than I need BUT even one zucchini plant can fill a bushel basket towards the end of the season. Even a few tomato plants can leave you with a pile every week. It is the damnedest thing too, you can’t give them away because everyone else has the same problem…well you caaaan give them away but more about that later because it is kinda beside the point.

We are planting this garden to save energy. That is because corporate america has forced a food system down our throats that literally has us drinking oil (processing and transportation) for inferior food products. The additives alone consume enough energy to power America for years. What does that have to do with my produce? Fall will fall and winter will set in and then where are you going to get your produce from? That’s right the freedom from the corporate foodchain evaporates as you trudge back to the store dreaming of those green beans you gave to your mom. Who love’s yah now baby?  So we need a way to store this produce until we need it. Basically we have to combat rot:

rot.jpg rot1.jpgrot2.jpg

www.hubcap.clemson.edu

www.ipm.iastate.edu

 www.caf.wvu.edu

:}

Yes that is right just like poop, rot is stinky stuff that is hard work. But rot is our friend when it comes to poop on the garden and our compost pile. Rot here is bad though. There are many ways to combat food rot, that is to preserve the food until you need it later. You can dry, cook, or chill your food and that will slow down the mold and bacterial processes that degrade your food. Basically what we are talking about is securing the nutrients.

The Oldest method of preserving food is to dry it. This was brought home to me when my wife went mushroom hunting last spring. She took one of my string bags with her. Months later I used the bag for something else and this cute little morel fell out and hit the floor. It was perfectly preserved and hard as a rock. I guarantee that if I put it in water it would reconstitute a mushroom fit for cooking. The fancy  pants phrase for taking the water out is dehydrating and the 37$ phrase for putting the water back is reconstituting or re-hydrating even worse. I prefer solar drying. The ingenuity of this is it is solar inputs (growing the food) and solar outputs (preserving the food). Not a drop of oil is spilled.There is a loss of nutritional value and taste/palatability in this or any preservation process, though there are some herbs that are actually better dried.

:}

http://www.budget101.com/dehydrated_foods.htm

Drying is the oldest method of preserving food. The early American settlers dried foods such as corn, apple slices, currants, grapes, and meat. Compared with other methods, drying is quite simple. In fact, you may already have most of the equipment on hand. Dried foods keep well because the moisture content is so low that spoilage organisms cannot grow.

Drying will never replace canning and freezing because these methods do a better job of retaining the taste, appearance, and nutritive value of fresh food. But drying is an excellent way to preserve foods that can add variety to meals and provide delicious, nutritious snacks. One of the biggest advantages of dried foods is that they take much less storage space than canned or frozen foods.

Recommended methods for canning and freezing have been determined by research and widespread experience. Home drying, however, does not have firmly established procedures. Food can be dried several ways, for example, by the sun if the air is hot and dry enough, or in an oven or dryer if the climate is humid.

With the renewed interest in gardening and natural foods and because of the high cost of commercially dried products, drying foods at home is becoming popular again. Drying is not difficult, but it does take time and a lot of attention. Although there are different drying methods, the guidelines remain the same.

Although solar drying is a popular and very inexpensive method, Illinois does not have a suitable climate for it. Dependable solar dehydration of foods requires 3 to 5 consecutive days when the temperature is 95 degrees F. and the humidity is very low. The average relative humidity in central Illinois on days with 95 degrees F. temperatures is usually 86 percent. Solar drying is thus not feasible.

http://www.motherearthnews.com/Real-Food/2003-06-01/Choosing-a-Food-Dehydrator.aspx

DAVID CAVAGNARO

Home-food dehydrators fall into two categories: those with stackable trays, and those constructed of a rigid box with removable shelves. Size is a factor; most fit on a countertop, but larger models are free-standing and require more space. Some models have base-mounted fans that move hot air vertically; one has a rear-mounted fan for moving air horizontally; yet another uses convection drying, with no fan at all.

I put these four different models through their paces during the peak of the humid harvest season here in Iowa. Each dehydrator dried lots of herbs and vegetables with comparable ease, but the fleshy crops, like tomatoes and peaches, put the dehydrators to the ultimate test, determining their maximum capacity, efficiency and overall effectiveness.

(dotdotdot)

All of the dehydrators I tested have their appropriate applications, and all performed well under most conditions. Determine your needs, space limitations and budget before you buy. When it comes down to preserving food flavors and quickly drying fruits, vegetables and meats, especially when fully loaded and under humid conditions, the Excalibur Large Garden model won my highest praise. Its rear-mounted fan, in my experience, simply did the best job.

:}

There are some special concerns with fruit:

Food Drying Principles

Dehydrating your own produce does require time and some knowledge of food drying principles.

Preparation

  1. Select the best fruit and vegetables! As with canning and freezing, dehydrated foods are only as good as the fresh fruit or vegetables. When selecting fruits and vegetables for dehydration, choose ones that are ripe, unbruised and at peak-eating quality.
  2. Prepare foods to be dehydrated as you want them to be served. Apples, for example, may be sliced, cut into rings, or pureed for fruit leather.
  3. Keep pieces uniform in size and thickness for even drying . Slices cut 1/8 to 1/4-inch in thickness will dry more quickly than thicker pieces.
  4. Some foods should be washed before drying. Foods such as herbs, berries and seedless grapes need only be washed before dehydrating.

After Drying (for fruit only)

  1. Allow dried FRUIT (not vegetables) time to “condition”: When dry, allow fruit to “condition” for four to 10 days before packaging for storage. The moisture content of home dried fruit should be about 20 percent. When the fruit is taken from the dehydrator, the remaining moisture may not be distributed equally among the pieces because of their size or their location in the dehydrator. Conditioning is the process used to equalize the moisture. It reduces the risk of mold growth.
  2. To condition the fruit, take the dried fruit that has cooled and pack it loosely in plastic or glass jars.
  3. Seal the containers and let them stand for 7 to 10 days. The excess moisture in some pieces will be absorbed by the drier pieces.
  4. Shake the jars daily to separate the pieces and check the moisture condensation. If condensation develops in the jar, return the fruit to the dehydrator for more drying.
  5. After conditioning, package and store the fruit as described below.

:}

Now you know why they call it dry wine….

Energy Efficient Gardening – What about your soil

So you have your soil test back. Hopefully you have planted several plantings of your favorite stuff to eat so that they will continue to produce for as long as the weather will allow. In a totally fluke year I had some spinach that lasted for a year and well into the next spring.

It is time to start both improving your soil and planting your “main” crops. The soil test says that you “need something”. Now I am not going to cover all of the soil additives but usually there will be somekind of chemical deficiency. Here you run smack dab into your modern industrial farming dilemma. Don’t worry, this will only last for a year. At the end of World War II the world had a total surplus of explosives and poison gas. What to do? Well they converted the explosives to nitrogen fertilizer and they turned the poison gas into herbicides and pesticides. Farmers fell in love with them and well here we are no longer loving our food. NO2 (commonly called Nox) is a much more potent greenhouse gas than CO2 It is estimated that when farmers fertilize there fields they castoff more greenhouses gases than the entire world’s transportation fleet:

http://gristmill.grist.org/story/2008/5/16/124957/304

Nitrogen bomb

‘Science’: nitrogen as important as carbon in climate change

Posted by Tom Philpott at 5:05 PM on 16 May 2008

Speaking of the troubles associated with industrial agriculture and its fertilizer regime, check this out:

“The public does not yet know much about nitrogen, but in many ways it is as big an issue as carbon, and due to the interactions of nitrogen and carbon, makes the challenge of providing food and energy to the world’s peoples without harming the global environment a tremendous challenge.”

The speaker is University of Virginia environmental sciences professor James Galloway (quoted in an AP piece), talking about his paper published (abstract here) in the latest Science.

According to Galloway, “We are accumulating reactive nitrogen in the environment at alarming rates, and this may prove to be as serious as putting carbon dioxide in the atmosphere.”

Nothing new here that I can tell at first glance. (I’d love to read the paper, but it’s password-protected.) I agree, though, that nitrogen’s role in climate change is way under-discussed.

The same issue of Science also contains an article about how synthesized nitrogen affects the oceans — specifically their role as greenhouse-gas sinks.

:}

So what to do about nutrients? Well it all comes down to crap. That’s right manure, excrement or poo. Not your’s. Though there is a case to be made for that, the small scale gardener is hard pressed to deal with human crap. In fact there are better fertilizers around. But lets take a step backwards, in the “old days” of sustainable farming the farmers had all kinds of animals, goats, cows, horses, mules, and chickens to name a few. They would collect this shit and straw from their animal’s housing and their yards and toss it in a pile. At the end of the growing season they would take all this manure and spread it on their field. Over winter it would break down. Then in the spring when they plowed they would turn it into the soil and “there you have it” fertile soil.

http://www.aces.edu/department/crd/publications/ANR-723.html

ENVIRONMENTAL EDUCATION SERIES
ENVIRONMENTAL QUALITY
Agriculture & Natural Resources

EXTENSION ENVIRONMENTAL EDUCATION, AUBURN UNIVERSITY, AL 36849-5647


Using Livestock Manure As Fertilizer

ANR-723, 1992. By Charles Mitchell, Extension Agronomist, Agronomy, Auburn University


Livestock manure is an excellent fertilizer for the soil, providing such nutrients as nitrogen, phosphorus, and potassium. Manure application can also benefit the soil’s water holding capacity and tilth. When using livestock manure, however, one should follow good management practices in order to avoid hazards to the crop and the environment. Sources Of Livestock ManurePoultry waste, cattle manure, and swine manure are all used as organic fertilizers in Alabama. They are all excellent sources for nutrients; however, nutrient compositions will vary among operations and over time. Users of manures from broiler houses, lagoons, or feedlots should have an idea of the total and available nutrient content before they are applied to land.Possible ProblemsBecause nitrate-nitrogen can leach into groundwater and both nitrogen and phosphorus can erode or runoff into streams, manure applications should be based strictly on the nutrient requirement of the crop. Therefore, the soil should be tested to determine nutrient needs for the crop to be grown.Good Management PracticesThe following precautions should be taken in order to prevent nutrient losses through leaching, erosion, and runoff:

  1. Eliminate excessive applications.
  2. Time applications appropriately, rotate crops,
  3. and use winter cover crops. Apply manure when it will be utilized by the crop.
  4. Incorporate or inject the applications into the
  5. soil. Do not leave the manure on the soil surface.
  6. Do not apply manure to steep slopes or during
  7. periods prone to erosion and runoff.
  8. Document the amounts and contents of material applied.
  9. Protect soil from erosion.
  10. Use filter strips or buffer zones between fields
  11. and nearby streams

:}

So when I end my growing season, I take a couple of big tubs to a local animal farm and I get free poo and straw from the farmer. Take it to my garden and toss it on. Big draw backs? It’s hard work and it stinks. But so what? Why did I say that this will be a problem for you only a year? Well because you have started a compost pile (hint hint) and you have located a farmer (hint hint). What to do now for you though. Well, you can go get fertilizer for one year and tell yourself everyone has to start somewhere. Or you can buy composted manure. Here again you have be to careful. Transportation and its oil use is the real issue so read the labels. Buy the composted manured produced the closest to you. If you are lucky you can find some poo from your own state. Now, if you have started your seeds inside and it’s time to plant YOUR plants. Or if you depend on a garden center it’s time to plant THEIR plants. Try to stagger them just like you did for your early crops so that they will produce for the entire growing season.

Oh, and for awhile you maybe a standard “row” gardener but there are more efficient ways to use your land:

http://www.squarefootgardening.com/

The Official Site of Square Foot Gardening and Mel Bartholomew, Originator and Author

Welcome  To  My  Garden

No Work, Organic Gardening the Square Foot Way


:}

or french intensive gardening


http://www.learn2grow.com/gardeningguides/edibles/planting/FrenchLesson.aspx

A French Lesson in Intensive Planting

Linnea Thornton

Juvenile Garden
Photo Credit: Courtesy of Barbara Wilde, L’Atelier Vert,Everything French Gardening, frenchgardening.com
This juvenile bed in a French garden shows how closely young plants are crowded together in intensive planting.

Crowding a bunch of plants in a narrow plot might not seem like a good idea at first. After all, it runs counter to everything you’ve learned about gardening. But this specialized method of planting – called French intensive gardening – is actually a tried-and-true technique to maximize your harvest in a small space. Even if you’ve only got a tiny plot, you can get amazing results if you develop it properly.
As you might’ve guessed by its name, French intensive gardening evolved in Europe. Its purpose is to make the most of limited growing space. Known as “square-foot gardening” in the US, it’s also the preferred method of many growers who want extra produce for themselves or to share with friends and neighbors.

:}

:}

What Is The Most Environmental Thing You Can Do Right Now – It saves energy as well

Plant a garden. You think I am kidding right. BUT if everyone on the planet who does not have a vegetable garden planted one, the world would change. Most products that you buy in the grocery store in America travel 1,500 miles…That’s a lot of gasoline products. All the produce, herbs and flowers you grow soak up carbon dioxide, especially sweet corn. Plus if you compost your garden waste you put that carbon directly into the soil where it will not be released. Plant a tree while you are at it. If all 7 billion people in the world planted a tree our problems would temporarily be over. Young trees soak up an incredible amount of carbon as they grow. Not to mention the health and well being benefits from working out doors and being away from modern stress inducers. Or the health benefits of eating good nutritious food. If you have kids teach them how to do it (it is no longer innate) and you will have passed along a valuable skill. Invest in an efficient refrigerator and a small efficient freezer to store your valuable products. This saves bunches too. If you are really adventurous invest in a dehydrator and a solar cooker or make your own. You save even more. By the time you are done heck you wlll amaze yourself at how much you have done. Seem impossible? NOPE, it starts with the first seed you plant. So lets get agrowing.

Getting Started:

Some of you are lucky to have year round growing conditions. As the world warms more of you will enjoy that perk. But where I live in Illinois it’s pretty much a 3 season affair. Today is March 6th and I plan on planting a row of peas and some lettuce and spinach. That will be dicey though and if we have an ice storm in April or early May it will be a wipe out. Such is life. If I get lucky I will be freezing sweet peas by the end of May. Here are some great sources for getting in the groove.

http://www.finegardening.com/

Planning Your First Vegetable Garden

March 5th, 2009 in Grow It, Live It

Ruth Ruth Dobsevage, editor

So you’ve decided to grow some veggies this year? Welcome to the club. Before you decide on what to grow or pick up a spade, you need to make some basic decisions about your garden’s location, size, and shape. Here are some things to consider.

Location
Walk around your property as you try to decide on a location for your garden-to-be.

Vegetables do best in full sun. You will get decent results with less than that, but in general strive for a site that gets at least six hours a day during the summer. Remember that sun patterns change dramatically with the seasons; a site that looks good in April may be too shady when the leaves come out.

Another factor to consider is proximity to your kitchen. You are more likely to check out your garden frequently if it is close to the house. My garden is maybe 30 feet from the kitchen door. When I need some parsley or mint, or maybe a few more tomatoes for a salad, it’s not a big deal to go out and get them.

If you have a choice, a flat area is better than a hilly one. A gently sloped site can work well, especially one that faces south or west.

What about water? You will most likely want a source close by, be it an outside tap, a rain barrel, or even a stream or pond.

Don’t despair if your lot is is very small. Even if you don’t see a way to create a separate garden area, you can probably tuck a couple of vegetable plants in somewhere: near the house or by the garage, perhaps. Or on the deck in containers.

Size and shape
For a garden of moderate size, aim for 400 square feet (20×20) to 625 square feet (25×25). You’ll have enough space to grow several different crops, but not so much that you’ll be overwhelmed. If even that seems daunting, start small. You can always enlarge the space later.

Gardens are generally square or rectangular, but they don’t have to be. You may want a different configuration to take advantage of sun patterns, to work around boulders, or just for artistic reasons. The plants won’t care if they are arranged in straight lines or curves.

:}

Personally I pick any 10 x 20 ft area that is unshaded and jump in. Begginners should start smaller. But if you are going to grow peppers, squash, corn or tomatoes you need a lot of space. Just think, the bigger your garden the less grass to mow.

http://www.organicgardening.com/

The Beginner’s Guide to Organic Gardening


 Gardening is not too complex. Almost all of us–probably in grade school–planted a seed in a cup of dirt, watered it, and watched it grow. But creating a garden that produces fresh food and flowers all season is not so elementary, especially to those who did not grow up gardening. So we’ve compiled this guide to the basics of organic gardening and the keys to success we’ve learned over the years. When you’re done reading, look at your thumb–you may see a tint of green that wasn’t there before.

No. 1 Plant Seeds

1. Make your bed. About three weeks before you are ready to plant, after the soil has dried so that it doesn’t clump when you pick up a fistful, sink a fork into the earth. Loosen it down to about 12 inches, add a half-inch layer of compost, and rake the surface of your garden until it has no weeds, dirt clumps, or big stones. Over the next three weeks, pull any weeds that come up. Raking and then letting the soil sit for a few weeks brings out weed seeds that were lurking in the soil.
For more information on garden beds, check out this article about raised beds and this video to see how to build a raised bed, or watch this video to see how to turn your lawn into a garden bed.


:}

I am not going to copy all of this stuff. go and read it yourself. If you have never done it before this is essential reading:


Garden Design

Horticulture

Garden Design

Country Gardens

Gardening How-To

Herb Quarterly

 Growing Edge

Water Gardening

Garden Compass

:}

Don’t read too long though, that’s what winter or nightfall is for. Get out doors! NOW

:}

The Climate March In Washington – I purposely did not want to post this until the event was over

People protesting in great numbers or with great effect comes and goes. There are 2 types of “marching in the street”. There is Cause Marching and there is Purpose Marching. These types of protests can draw people from all over the country and draw hundreds of thousands of people; or they can consist of 25 people and Al Sharpton Marching in front of the New York Times building. Sometimes those protests can escalate to riots. Most notably the Civil War Veteran’s protest that rankled Grant’s first Term in office and the Hay Market incident in Chicago. The Poverty March on Washington led by Martin Luther King was a more peaceful example. But the March Against Climate Change was not going to be one of those.

You could tell by the lack of activity on the internet and the preposterous claims by the organizers, that this was pretty much going to be a dud. I mean does no one think rationally about these things. The organizers thought that 10,000 people would come to DC and protest in early March? In the dead of winter? Maybe on a nice spring day but….So maybe 10,000 people came to the PowerShift09 Conference but didn’t want to freeze there butts off or maybe the conference was a bust too. Who knows? Nobody is really saying. But from the pictures and everyone’s estimates  about 2,500 people showed up in the SNOW…What?  Don’t they get the Weather Channel? All that having been said, here is how the regular media guys saw it:

 http://www.time.com/time/health/article/0,8599,1882700,00.html

Despite Snow — and Irony —

a Climate Protest Persists

By Bryan Walsh / Washington

The call rang out through Washington early on the morning of March 2: the biggest act of civil disobedience against global warming in American history would not, in fact, be snowed out.

Environmental groups, led by Greenpeace and the Rainforest Action Network, had enlisted eco-celebrities such as Robert Kennedy Jr. and Bill McKibben and registered more than 2,000 youth protesters from around the country for a march on the coal-fired Capitol Power Plant, which supplies steam and cooled water to Congress. They planned to shut down the plant by peacefully blocking the entrances, a textbook act of civil disobedience for which many expected — perhaps eagerly — to be arrested. The message was simple: the burning of coal, which accounts for some 40% of U.S. carbon emissions, “is destroying the planet through global warming,” as Kennedy put it. America needs to get off coal, which supplies nearly half the country’s electricity, if it wants to have any hope of controlling its greenhouse gas emissions, and it should start with the Capitol plant. (See the top 10 green ideas of 2008.)

As it turned out, the action may have been almost too successful. On Feb. 26, just a few days before the protest, Speaker of the House Nancy Pelosi and Senate majority leader Harry Reid called for the 103-year-old plant to switch from coal to cleaner-burning natural gas, a move long pushed for by environmentalists but blocked by representatives from coal-heavy states. Protesters claimed an early victory. “Getting the plant to switch shows the power of popular pressure,” said Steven Biel, the director of Greenpeace’s global-warming campaign. But there was no doubt that by responding before the protesters hit the streets of the capital, Congress was simply moving one set of goalposts off the field.

coal_protest_0302.jpg

:}

This is how the organizers saw it. Please note that they only list three media sources. I call that a “big whup”

http://www.capitolclimateaction.org/

UNPRECEDENTED PROTEST

March 3rd, 2009

Yesterday thousands of people came together to offer an unprecedented example of mass protest and civil disobedience for the climate.

More than 2500 activists, many willing to risk arrest, successfully blockaded all five entrances to the Capitol Power Plant for more than four hours.

As impressive as that is, this action wasn’t just about this one coal-fired powerplant. The scale and the commitment of the participants was the biggest example yet of the kind of public support necessary to solve the climate crisis.

We aren’t going to stop global warming by just changing lightbulbs and driving hybrid cars. The only real solution is to come together and demand unprecedented change through unprecedented action.

And that’s exactly what happened yesterday.

Take a look at the media coverage of the action:

From the AP: Thousands rally for legislation on climate change

In Time Magazine: Despite Snow — and Irony — a Climate Protest Persists

On Alternet: Thousands Storm Capitol Hill in Largest Protest Against Global Warming

Victory: this is how to stop global warming

March 2nd, 2009

More amazing images from the largest mass civil disobedience for the climate in U.S. history where thousands of activists shut down the Capitol Power Plant. The only way we’re going to solve the climate crisis is by coming together and taking action. Like this:

dcmarch.jpg

:}

Either way it looks sooooo cold. The only way to get warm was to go back to your hotel room and suck power.

“God has a sense of humor,” said protester Rhody Streeter, of Louisville, Ky., referring to the weather.

:}